How to Start a Community Organic Fertilizer Group (Lessons from Thailand’s Club Pui Model)
TL;DR: Community composting groups let neighbors pool organic waste to produce free, nutrient-rich fertilizer. This guide covers the science, a 30-day setup plan, C:N ratios, bio-activator recipes, and Thailand’s proven club pui cooperative model.
Fertilizer prices have nearly doubled since 2020. For small-scale growers and backyard gardeners alike, that spike turned a routine expense into a genuine budget crisis. But in villages across northern Thailand, a quiet solution has been working for over a decade: neighbors pooling kitchen scraps, crop residue, and animal manure to produce their own soil amendments — for almost nothing.
These groups, known locally as club pui (ปุ๋ย means fertilizer in Thai), are one example of a much bigger movement. Community composting is spreading worldwide, and you don’t need a farm to start one. This guide walks you through the science, the setup, and the real-world lessons from cooperatives that have been doing this successfully for years.
Quick Facts
- Community composting groups can cut fertilizer costs by 40–60% per growing season
- A well-managed pile reaches pathogen-killing temperatures (55–65°C) within 5–7 days
- The ideal carbon-to-nitrogen ratio for fast decomposition is 25:1 to 30:1
- Thailand’s club pui network now includes over 200 village-level cooperatives
- Finished compost typically takes 30–90 days depending on climate and management
- Groups as small as 3–5 households can produce enough amendment for a full season
What Is Community Composting — and Why Does It Matter Right Now?
Community composting is exactly what it sounds like: a group of people — neighbors, gardeners, small farmers — who collectively collect organic waste and process it into nutrient-rich soil amendments. Instead of each household managing a lonely backyard bin that never quite heats up, the group builds larger piles that decompose faster and more completely.
The timing matters. Global synthetic fertilizer prices surged after 2021 due to supply chain disruptions and rising natural gas costs, which are a key input in nitrogen fertilizer production. For anyone growing food on a modest budget, those price tags haven’t fully retreated.
At the same time, municipal waste systems are overwhelmed. The U.S. Environmental Protection Agency estimates that food scraps and yard waste make up more than 30% of what Americans throw away — material that could instead be cycling back into the soil.
A community organic fertilizer group tackles both problems simultaneously. It diverts waste from landfills and replaces an expensive commercial product with something you made yourselves, from materials that were headed for the trash anyway.
The Thai Club Pui Model: A Blueprint That Actually Works
The term “club pui” comes from Thailand’s grassroots agricultural cooperatives, where the word pui (ปุ๋ย) simply means fertilizer. These groups emerged in the early 2000s in provinces like Chiang Mai and Chiang Rai, driven by farmers who were tired of going into debt every planting season to buy imported chemical inputs.
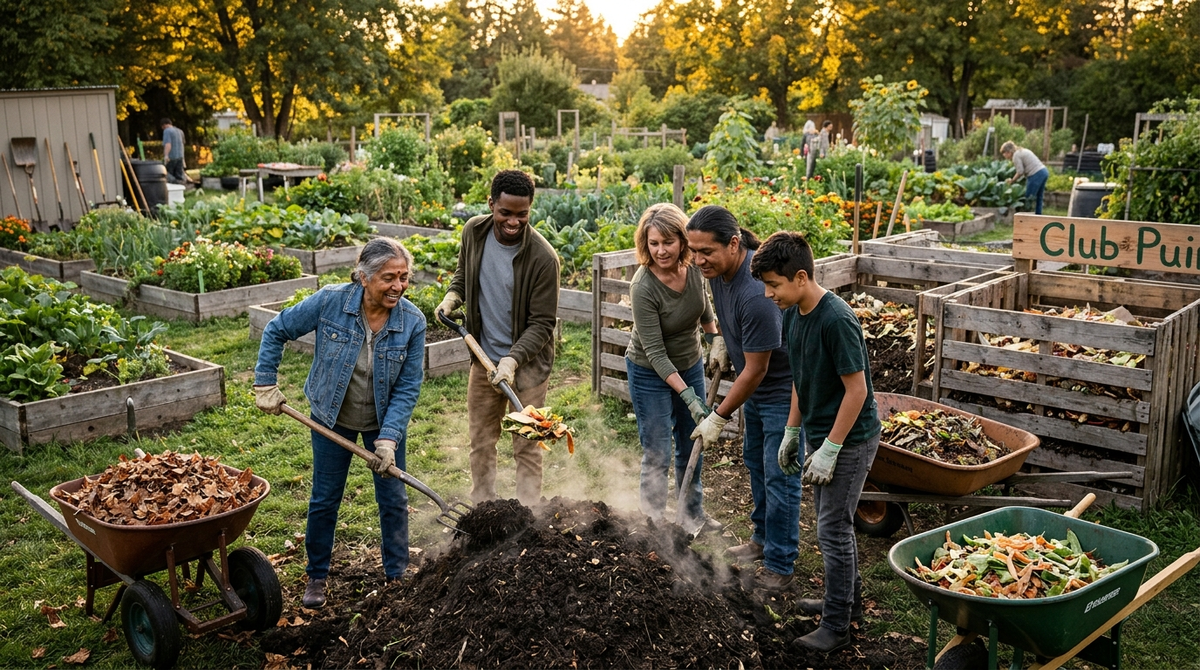
The model is deliberately simple. A typical club pui operates with 10–30 member households in a single village. Each family contributes whatever organic waste they generate — rice straw after harvest, vegetable peelings, livestock manure, banana stalks, and fallen leaves. The group designates a shared composting area, usually on the edge of someone’s field or a communal plot.
Members rotate responsibilities on a weekly schedule: one team turns the piles, another monitors moisture, and a third manages the collection route. After 45–60 days, the finished compost is divided proportionally based on each household’s contribution.
What makes this model worth studying isn’t just the compost itself. It’s the social infrastructure. Regular meetings create a space for farmers to share pest management tips, compare seed varieties, and troubleshoot problems together. In rural areas where agricultural extension services are stretched thin, that peer-to-peer knowledge transfer is invaluable.
The Science Behind the Pile: Temperature, C:N Ratios, and Microbes
This is where most community composting efforts either succeed or quietly fail. Piling up organic matter and hoping for the best works eventually, but understanding a few key variables will cut your processing time in half and produce a far superior product.
Temperature Benchmarks You Actually Need to Hit
A compost pile goes through distinct thermal phases, and each one matters. During the first 24–72 hours, mesophilic bacteria begin breaking down easily digestible sugars and proteins. The pile warms to roughly 20–40°C (68–104°F).
Then the thermophilic phase kicks in. Heat-loving microorganisms take over, and internal temperatures should climb to 55–65°C (131–149°F). This is the critical window. Maintaining temperatures above 55°C for at least three consecutive days destroys most human pathogens, weed seeds, and harmful fungi. For full sanitization — especially if your pile contains animal manure — aim for 15 days of thermophilic conditions with regular turning.
If your pile never exceeds 45°C, something is off. The most common culprits are insufficient nitrogen, too much water, or a pile that’s too small to retain heat. You generally need at least one cubic meter of material to sustain thermophilic temperatures reliably.
Carbon-to-Nitrogen Ratios for Common Materials
Microorganisms need both carbon (for energy) and nitrogen (for protein synthesis) to decompose organic matter efficiently. The ideal overall ratio in your pile is 25:1 to 30:1 (carbon to nitrogen, by weight). Too much carbon and decomposition stalls. Too much nitrogen and the pile goes anaerobic and smells like ammonia.
Here’s a practical reference for materials you’re likely to encounter:
| Material | C:N Ratio | Category |
| Sawdust | 200–500:1 | Very high carbon (use sparingly) |
| Rice straw / dry wheat straw | 60–80:1 | High carbon |
| Dry autumn leaves | 40–60:1 | Moderate-high carbon |
| Cardboard (shredded) | ~350:1 | Very high carbon |
| Cow manure | ~20:1 | Balanced |
| Kitchen vegetable scraps | 15–20:1 | High nitrogen |
| Fresh grass clippings | 15–20:1 | High nitrogen |
| Chicken manure | 7–10:1 | Very high nitrogen |
| Coffee grounds | ~20:1 | Balanced |
The trick is layering. A common mistake in community groups is dumping all the kitchen scraps (nitrogen-heavy) in one pile and all the dry leaves (carbon-heavy) in another. Instead, alternate layers: roughly two parts browns to one part greens by volume gets you close to the target ratio without needing a lab scale.
Natural Bio-Activators: LAB Serum and Indigenous Microorganisms
In Southeast Asian organic farming, and particularly in the club pui tradition, growers rarely rely on commercial compost starters. They make their own microbial inoculants from scratch. Two of the most effective are surprisingly simple.
Lactic Acid Bacteria (LAB) Serum: Rinse a cup of uncooked rice and save the milky wash water. Leave it in a loosely covered jar at room temperature for 5–7 days until it develops a sour smell. Strain it, then mix one part of this liquid with ten parts fresh milk. Let it sit another 5–7 days. The yellowish liquid that separates on top is your LAB serum — a potent inoculant full of beneficial bacteria. Dilute it 1:20 with water and spray it onto your compost pile during turning.
Indigenous Microorganisms (IMO): Cook a small batch of white rice until it’s slightly underdone. Place it in a shallow bamboo or wooden container, cover it with a breathable cloth, and bury it in a pile of leaf litter in a healthy forest or wooded area. After 5–7 days, the rice will be colonized by a web of white, purple, and yellow fungal mycelium. Mix this colonized rice with an equal weight of brown sugar or molasses to preserve it. Store in a cool, dark place and add a handful to each new compost pile as a microbial starter.
These methods cost almost nothing and introduce diverse, locally adapted microorganisms that commercial products often can’t match.
Step-by-Step: Launch Your Community Organic Fertilizer Group in 30 Days
You don’t need a grant, a nonprofit status, or a fleet of trucks. Here’s a realistic timeline for getting a group off the ground.
Week 1: Recruit and Map Resources. Start with 3–5 households. That’s enough to generate meaningful volume without creating logistical headaches. Walk your neighborhood and identify waste streams: Does a local café dump coffee grounds daily? Do neighbors bag up grass clippings for the curb? Is there a horse stable nearby? Map everything.
Week 2: Choose a Site and Build the Bins. You need a flat, well-drained area at least 10×15 feet, ideally with partial shade and access to water. Three-bin systems work best for continuous production: one bin for fresh material, one for the active thermophilic phase, and one for curing. Simple frames built from wooden pallets and chicken wire cost under $50 total.
Week 3: Start the First Pile. Layer your materials using the 2:1 browns-to-greens ratio. Aim for a pile at least 1 meter tall, 1 meter wide, and 1 meter long — anything smaller won’t generate enough heat. Water each layer as you build until the material feels like a wrung-out sponge (40–60% moisture). Add your LAB serum or IMO starter if you’ve prepared one.
Week 4: Establish the Turning Schedule. Turn the pile every 3–5 days during the first two weeks. This reintroduces oxygen and redistributes heat. Use a long-stemmed compost thermometer to check internal temperatures before each turn. Once the pile cools below 40°C and no longer heats up after turning, it’s entering the curing phase. Let it sit undisturbed for 2–4 weeks before use.
Community Compost vs. Store-Bought Synthetic Fertilizer
The comparison isn’t as one-sided as organic advocates sometimes suggest. Synthetics have real advantages in specific situations. Here’s an honest breakdown:
| Factor | Community-Made Compost | Commercial Synthetic Fertilizer |
| Upfront cost | Near zero (labor and waste materials) | 30–80+ per 50-lb bag, rising |
| Nutrient concentration | Low (typically 1-1-1 to 2-1-2 NPK) | High (e.g., 46-0-0 for urea) |
| Speed of nutrient availability | Slow release over months | Immediate (days) |
| Soil structure improvement | Excellent — adds organic matter, improves water retention | None — can degrade structure over time |
| Microbial activity | Stimulates beneficial soil biology | Can suppress microbial populations |
| Risk of nutrient runoff | Very low | High — major contributor to algal blooms |
| Convenience | Requires planning, labor, and space | Buy a bag, spread, done |
The takeaway? If you need to correct an acute nitrogen deficiency in a commercial crop this week, synthetics are the right tool. But for building resilient, productive soil over multiple seasons — which is what most small-scale growers actually need — community-produced compost is the smarter long-term investment.
Five Mistakes That Quietly Kill Your Compost Pile
Even experienced gardeners make these errors when scaling up to group production.
1. Ignoring moisture levels. The squeeze test is your best friend: grab a handful of compost material and squeeze hard. A few drops of water should appear between your fingers. If water streams out, the pile is waterlogged — add dry browns and turn. If nothing appears and the material crumbles, it’s too dry — hose it down during the next turn.
2. Building piles too small. A pile under one cubic meter simply can’t retain enough heat to reach the thermophilic phase. This is actually one of the biggest advantages of community composting over solo backyard bins: more contributors mean bigger piles, which means faster, hotter decomposition.
3. Adding the wrong materials. Meat, dairy, oils, and pet waste (especially from carnivores like dogs and cats) introduce pathogens and attract pests. Keep the pile strictly plant-based and herbivore manure.
4. Never turning. According to Cornell University’s Waste Management Institute, oxygen levels inside an unturned pile can drop to near zero within days, shifting the process from aerobic decomposition to slow, smelly anaerobic fermentation. Turn at least every 5–7 days during the active phase.
5. Using finished compost too soon. Immature compost can actually tie up nitrogen in the soil as it continues to decompose, temporarily starving your plants. The finished product should be dark, crumbly, and smell like forest earth — not sour or ammonia-like. If you can still identify individual banana peels or leaves, it’s not ready.
Scaling From a Backyard Bin to a Neighborhood Network
Once your initial group is producing consistent batches, the natural next question is growth. The most successful community composting networks expand organically rather than through top-down planning.
Start by inviting adjacent streets or blocks to contribute their organic waste, even if they don’t want to participate in the turning and management. More feedstock means larger, hotter piles and more finished product. You can distribute surplus compost to contributors as an incentive.
Some groups formalize at this stage — creating a simple membership agreement, setting up a shared tool fund, or partnering with a local community garden or school. Others stay deliberately informal. There’s no right answer, but clear communication about expectations prevents most conflicts before they start.
The club pui cooperatives in Thailand offer a useful precedent here. The most resilient groups are the ones that keep decision-making local and resist the urge to over-bureaucratize. A group chat and a shared calendar often work better than a formal board structure.
Key Takeaways
- Community composting groups cut fertilizer costs by 40–60% while diverting organic waste from landfills
- Maintain pile temperatures of 55–65°C for at least 3 days to destroy pathogens and weed seeds
- Target a carbon-to-nitrogen ratio of 25:1 to 30:1 using roughly 2 parts browns to 1 part greens by volume
- Natural bio-activators like LAB serum and IMO cost almost nothing and outperform many commercial starters
- A group of just 3–5 households can launch a functional composting operation within 30 days
Frequently Asked Questions
How do I start a community composting group in my neighborhood?
Begin with 3–5 willing neighbors, identify local organic waste streams (kitchen scraps, yard clippings, coffee grounds), and choose a shared composting site. Build a simple three-bin system from pallets, establish a turning schedule, and agree on how you’ll divide the finished compost.
What temperature should my compost pile reach?
Your pile should reach 55–65°C (131–149°F) during the thermophilic phase and hold that range for at least three consecutive days. This temperature kills most pathogens and weed seeds. Use a long-stemmed compost thermometer to monitor the core.
What is the ideal carbon-to-nitrogen ratio for composting?
The ideal C:N ratio is 25:1 to 30:1 by weight. In practice, layering roughly two parts carbon-rich “browns” (dry leaves, straw, cardboard) to one part nitrogen-rich “greens” (food scraps, grass clippings, manure) by volume gets you close enough without lab equipment.
Can I compost meat, dairy, and cooked food in a community pile?
It’s best to avoid meat, dairy, oils, and cooked foods in open community piles. These materials attract rodents and flies, create strong odors, and can harbor pathogens unless the pile consistently reaches high temperatures. Stick to plant-based scraps and herbivore manure.
How long does community compost take to finish?
A well-managed pile with regular turning and proper moisture typically produces finished compost in 30–60 days during warm weather. In cooler climates or with less active management, expect 60–90 days. The compost is ready when it’s dark, crumbly, and smells earthy.
What is the club pui model from Thailand?
Club pui is a Thai community cooperative model where village households pool organic waste — rice straw, manure, kitchen scraps — to collectively produce organic fertilizer. The term combines “club” with the Thai word pui (ปุ๋ย, meaning fertilizer). Over 200 such groups operate across northern Thailand.
The concept is genuinely simple: take waste that’s already being produced, process it together, and return it to the soil. No special equipment, no expensive inputs, no advanced degrees required. The Thai club pui cooperatives proved the model works at scale over a decade ago, and the same principles apply whether you’re in a village outside Chiang Mai or a suburb outside Chicago.
The hardest part isn’t the composting. It’s the first conversation with your neighbor. After that, the microorganisms do most of the work.